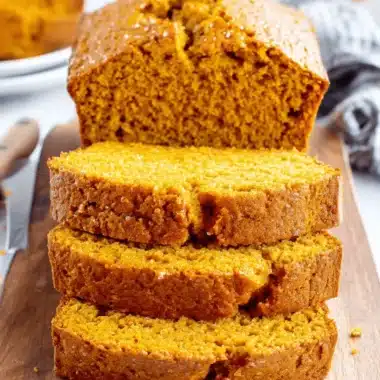

When the air gets that little bit of a chill and the leaves start to turn, my kitchen immediately starts craving the scent of fall. For me, nothing says “cozy” quite like a warm slice of pumpkin bread. If you’ve ever felt a little intimidated by baking or have been let down by dry, crumbly loaves in the past, I want you to know you’re in the right place. This is my ultimate foolproof guide to the most delicious pumpkin bread you’ll ever make.
This recipe is designed to be simple, stress-free, and deliver a perfectly moist and flavorful loaf every single time. It’s the kind of baking that feels like a warm hug, filling your home with the incredible aroma of cinnamon, nutmeg, and cloves. I’m going to share all my secrets to help you master this classic, avoiding all the common pitfalls so you can bake with total confidence.
Why This is the Best Pumpkin Bread Recipe You’ll Ever Make
I know there are thousands of pumpkin bread recipes out there, but I truly believe this one is special. I designed it for busy people like us who want amazing results without complicated steps. It’s the recipe I turn to again and again, and I’m so excited to share why it works so beautifully.
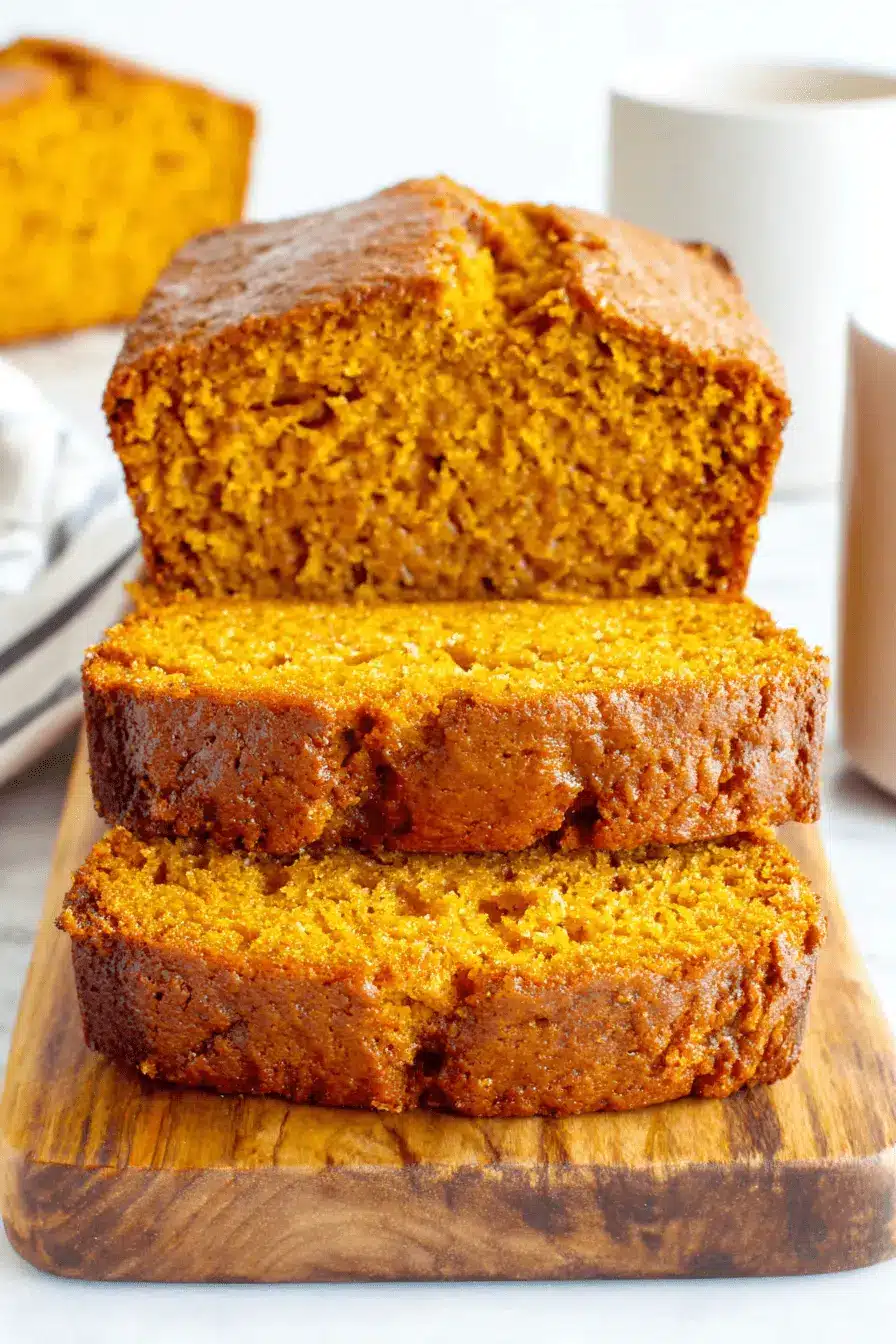
First, it guarantees a wonderfully moist crumb that stays fresh for days. No more sad, dry bread! Second, the spice blend is perfectly balanced. It’s warm and fragrant without being overwhelming, letting that sweet pumpkin flavor really shine through. Best of all, it’s incredibly easy to prepare. Even if you’re a beginner baker, you can absolutely nail this recipe and feel like a pro.
The Science Behind Perfectly Moist Pumpkin Bread
Have you ever wondered why a recipe works? Understanding a little bit of the science can make you a much more confident baker. It’s not as complicated as it sounds, I promise!
The butter in this recipe does more than add flavor; its fat content is essential for creating a tender, moist texture. It coats the flour particles, which helps prevent the bread from becoming tough. The leavening agents, baking soda and baking powder, react with the acidic components in the pumpkin puree to create tiny air bubbles, giving the bread its beautiful lift and light structure.
Sugar isn’t just for sweetness. It’s also a key player in moisture, as it attracts and holds onto water, which keeps the loaf from drying out. And here’s a crucial tip: don’t overmix your batter! Once you add the flour, mixing too much develops gluten, which can make quick breads like this tough and dense. A few streaks of flour are perfectly fine. Finally, using canned pumpkin puree is my secret for consistency, as it has a predictable moisture content that ensures your bread turns out perfect every time.
Essential Ingredients for Your Delicious Pumpkin Bread
Getting your ingredients ready before you start is one of my favorite ways to make baking feel calm and organized. Here’s everything you’ll need.
- 2 cups all-purpose flour, (spooned into measuring cup and leveled-off)
- ½ teaspoon salt
- 1 teaspoon baking soda
- ½ teaspoon baking powder
- 1 teaspoon ground cloves
- 1 teaspoon ground cinnamon
- 1 teaspoon ground nutmeg
- ¾ cup (1½ sticks) unsalted butter, softened: Using unsalted butter lets you control the salt level perfectly. Make sure it’s softened to room temperature for easy creaming.
- 2 cups sugar
- 2 large eggs
- 1 (15-oz) can 100% pure pumpkin (I use Libby’s): Canned pumpkin provides consistent moisture and flavor, which is key for a foolproof result. Make sure it’s pure pumpkin, not pumpkin pie filling.
How to Make the Best Pumpkin Bread (Step-by-Step Instructions)
Ready to fill your kitchen with the amazing scent of fall? Let’s walk through this step-by-step. You’ve got this!
-
Preheat the oven to 325°F (165°C) and set an oven rack in the middle position. Generously grease two 8 x 4-inch (20 x 10-cm) loaf pans with butter and dust with flour. Alternatively, you can use a baking spray that contains flour, like Pam with Flour or Baker’s Joy.
- Pro Tip: Properly greasing and flouring your pans is the secret to getting the loaves out cleanly without any sticking. Don’t skip this step!
-
In a medium bowl, combine the flour, salt, baking soda, baking powder, cloves, cinnamon, and nutmeg. Whisk until everything is well combined and set the bowl aside.
- Common Mistake to Avoid: Make sure you whisk the dry ingredients thoroughly. This ensures the spices and leavening agents are evenly distributed, so you get a consistent flavor and rise in every bite.
-
In a large bowl of an electric mixer, beat the butter and sugar on medium speed until just blended. Add the eggs one at a time, beating well after each addition. Continue beating for a few minutes until the mixture is very light and fluffy. Beat in the pumpkin. Don’t worry if the mixture looks a little grainy or curdled at this point, that’s completely normal!
- Pro Tip: Beating the butter, sugar, and eggs until “light and fluffy” incorporates air into the batter, which helps create a lighter-textured bread. This step is worth the extra minute or two.
-
Add the flour mixture to the wet ingredients and mix on low speed just until combined.
- Common Mistake to Avoid: This is the most important place not to overmix! Stop mixing as soon as the last streaks of flour disappear. Overmixing will make your bread tough.
-
Turn the batter into the prepared pans, dividing it evenly between the two. Bake for 65 to 75 minutes, or until a cake tester inserted into the center comes out clean. Let the loaves cool in the pans for about 10 minutes, then carefully turn them out onto a wire rack to cool completely.
- Pro Tip: Letting the loaves cool in the pan for 10 minutes helps them set up, making them easier to remove without breaking. Once cooled, store your bread covered with aluminum foil or in a cake keeper at room temperature for up to 3 days.
Pro Tips for a Perfectly Domed Pumpkin Bread That Won’t Sink
A sunken, sad-looking loaf can be so discouraging, but it’s usually an easy fix! Here are my best tips for achieving that beautiful, domed top every time.
First, make sure your oven is fully preheated. An oven that isn’t hot enough can cause the bread to rise too slowly and then collapse. An inexpensive oven thermometer can be a game-changer for accurate baking. As I mentioned before, be very careful not to overmix the batter once the flour is added, as this can lead to a dense structure that is more likely to sink.
Recognizing when the bread is truly done is also key. The toothpick test is good, but also look for visual cues. The top should be firm, golden brown, and you might see slight cracks around the dome. If you have an instant-read thermometer, the internal temperature should be around 200°F (93°C). Finally, let the bread cool in the pan for 10 minutes before moving it to a wire rack. This gradual cooling process helps the structure set properly.
Troubleshooting Common Pumpkin Bread Problems
Even experienced bakers run into issues sometimes, so don’t be discouraged! Here are a few common problems and how to fix them.
- My bread is dry: This is often caused by measuring flour incorrectly. Be sure to spoon the flour into your measuring cup and level it off with a knife, rather than scooping directly from the bag, which compacts it. Overbaking is another culprit, so start checking for doneness at the lower end of the baking time.
- My bread is tough or dense: Overmixing is almost always the reason for tough quick breads. Mix the wet and dry ingredients just until they come together. A few little lumps in the batter are perfectly okay.
- My bread has a gummy texture: This usually means the bread is underbaked. The center didn’t have enough time to cook through, leaving a dense, gummy streak. Make sure your cake tester comes out completely clean from the center of the loaf.
- The crust is too dark but the inside isn’t cooked: Your oven might be running hot. If you notice the top browning too quickly, you can loosely tent a piece of aluminum foil over the loaf pan for the last 15-20 minutes of baking.
Pumpkin Bread Variations & Flavor Boosters
Once you’ve mastered the classic recipe, it’s so much fun to start experimenting with other ultimate foolproof pumpkin pie recipes and fall treats! This bread is a wonderful canvas for other flavors and textures.
You can easily boost the flavor by adding 1 teaspoon of orange zest to the batter for a bright, citrusy note, or a pinch of candied ginger for a little spicy warmth. For mix-ins, chocolate chips are always a hit, and toasted pecans or walnuts add a fantastic crunch. A simple cream cheese swirl or a crunchy streusel topping can also take your bread to the next level.
Here are a few easy substitutions and additions to try:
| Variation / Substitution | Details / How To |
|---|---|
| Gluten-Free | Use a 1:1 gluten-free baking flour blend that contains xanthan gum. You can follow the recipe instructions as written. |
| Dairy-Free | Substitute the unsalted butter with a high-quality, dairy-free butter stick. My favorites are from Miyoko’s Kitchen or Earth Balance. |
| Reduced Sugar | You can reduce the granulated sugar by up to ¼ cup without major texture changes. If you want to reduce it more, a substitute like erythritol might work, but you may need to adjust liquids. |
| Add Chocolate Chips | Gently fold in 1 cup of chocolate chips after mixing in the dry ingredients. Semi-sweet or dark chocolate chips are delicious here. |
| Add Nuts | Fold in 1 cup of chopped walnuts or pecans with the dry ingredients. I love toasting them in a dry skillet for a few minutes first to bring out their nutty flavor. |
| Cream Cheese Swirl | Beat together 4 oz softened cream cheese, 1 egg yolk, and ¼ cup sugar until smooth. Layer it with the batter in the loaf pan and gently swirl with a knife before baking. |
| Streusel Topping | Mix ½ cup flour, ¼ cup brown sugar, and ½ teaspoon cinnamon. Cut in 4 tablespoons of cold, cubed butter until crumbly. Sprinkle over the batter before baking. |
| Mini Loaves / Muffins | Adjust the baking time. Mini loaves usually take 30-40 minutes, and standard muffins take 20-25 minutes. Just fill the pans about two-thirds full. |
Make-Ahead, Storing, and Serving Your Pumpkin Bread
This bread stores beautifully, which makes it perfect for planning ahead. Once it’s completely cooled, you can keep the whole loaf tightly wrapped in aluminum foil or in an airtight container at room temperature for up to 3 days. I find the flavor actually gets even better on the second day!
I don’t recommend making the batter ahead of time, because the baking soda and powder start working as soon as they’re mixed with the wet ingredients. For longer storage, this bread freezes wonderfully. You can freeze the whole loaf or individual slices. Just wrap them tightly in plastic wrap, then a layer of foil, and they’ll keep in the freezer for up to 3 months.
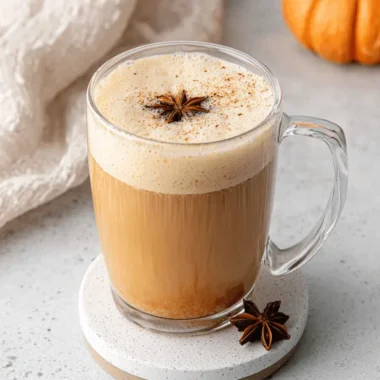
When you’re ready to enjoy it, you can re-warm slices in the microwave for about 15-20 seconds or in a toaster oven for a slightly crispy edge. I love serving a warm slice with a cup of amazing homemade pumpkin spice latte or tea. It’s fantastic on its own, but also delicious with a smear of butter, cream cheese, or a drizzle of maple syrup.
Pumpkin Bread for Gift Giving (A Thoughtful Treat)
A loaf of homemade pumpkin bread is one of the most thoughtful gifts you can give. It’s perfect for neighbors, teachers, or friends during the fall season and holidays, alongside other delightful treats like ultimate chewy pumpkin cookies.
To package it for gifting, let the loaf cool completely, then wrap it in clear cellophane and tie it with a pretty ribbon or some rustic twine. You can also find disposable paper loaf pans that are perfect for baking and gifting directly. This bread will stay fresh for a couple of days, so it’s a great gift to drop off for someone to enjoy. For a special touch, you could attach a small tag with the ingredients and simple re-warming instructions.
Frequently Asked Questions about Pumpkin Bread
Can I use fresh pumpkin puree?
Yes, you can, but it’s a bit more work. Fresh pumpkin puree often has a higher water content than canned, which can affect the texture of the bread. If you use it, I recommend blotting it between paper towels to remove some excess moisture before measuring.
What’s the difference between pumpkin bread and pumpkin cake?
Generally, pumpkin bread is denser and less sweet than pumpkin cake, which is typically lighter, fluffier, and often served with frosting. This recipe walks a delicious line between the two!
Can I freeze pumpkin bread?
Absolutely! It freezes perfectly. Once cooled, wrap the loaf or individual slices in plastic wrap and then aluminum foil. It will last for up to 3 months in the freezer. Thaw at room temperature before serving.
Do I need a stand mixer to make pumpkin bread?
Not at all! You can easily make this recipe with a hand mixer or even by hand with a whisk and a spatula. Just make sure your butter is very soft so it’s easy to cream with the sugar.
Why is my pumpkin bread dry?
The most common reasons are overbaking or measuring too much flour. Try checking the bread for doneness a few minutes early, and be sure to spoon and level your flour when you measure it.
Can I add extra spices?
Of course! Feel free to adjust the spices to your taste. A little bit of allspice, ginger, or cardamom would also be lovely additions.
Embrace the Cozy Flavors of Fall
I truly hope this recipe brings a little warmth and comfort to your kitchen. There is something so satisfying about pulling these fragrant loaves from the oven, knowing you made them yourself. It’s a simple joy, and one that’s perfect for sharing.
So go ahead, give it a try! Embrace the cozy season and fill your home with the wonderful smell of fall baking. I would love to see your creations! If you make this pumpkin bread, please leave a comment below and let me know if you tried any variations. You can also share a photo on social media and tag me at AishaRecipes. And if you’re looking for more simple, comforting recipes, be sure to sign up for my newsletter
Pumpkin Bread
Ingredients
Equipment
Method
- Preheat oven to 325°F (165°C) with a rack in the middle. Grease and flour two 8x4-inch loaf pans.
- In a medium bowl, whisk together the flour, salt, baking soda, baking powder, cloves, cinnamon, and nutmeg; set aside.
- In a large bowl, beat softened butter and sugar with an electric mixer until blended. Add eggs one at a time, beating until light and fluffy, then beat in the pumpkin.
- Gradually add the dry flour mixture to the wet ingredients, mixing on low speed until just combined.
- Divide the batter evenly into the prepared pans and bake for 65-75 minutes, or until a cake tester comes out clean. Cool loaves in pans for 10 minutes, then transfer to a wire rack to cool completely.