
Why This Is Your New Favorite Pumpkin Pie Recipe
I know there are a lot of pumpkin pie recipes out there, but I truly believe this one will become your go-to. Here’s why I think you’ll fall in love with it:
- Absolutely Foolproof: My instructions are clear and simple, designed to take the guesswork out of baking. I’ve included all my best tips, from getting the texture just right to avoiding those dreaded cracks, so you can bake with total confidence.
- The Perfect Silky Texture: The secret to a truly great pumpkin pie is the filling. This recipe uses the perfect ratio of pumpkin, evaporated milk, and eggs to create a custard that is unbelievably smooth, creamy, and never watery.
- Classic, Customizable Flavor: I start with a classic blend of warm spices like cinnamon, ginger, and cloves that feels just like home. But I also encourage you to play with the spices to make it your own! It’s your pie, after all.
- No More Soggy Bottoms: I share all my secrets for achieving a perfectly crisp and flaky crust that stands up beautifully to the rich, creamy filling.
How to Make the Ultimate Foolproof Pumpkin Pie
Ready to create the best pumpkin pie of your life? Here are the exact ingredients and step-by-step instructions you’ll need.
Ingredients
- 1 9-inch Homemade pie crust (or store-bought, deep dish, unbaked)
- 3/4 cup granulated sugar
- 1 teaspoon ground cinnamon
- 1/2 teaspoon salt
- 1/2 teaspoon ground ginger
- 1/4 teaspoon ground cloves
- 2 large eggs
- 15 ounce (425g) can canned pumpkin (or fresh pumpkin puree)
- 12 ounce (355ml) can evaporated milk
Instructions
- Preheat oven to 425 degrees F (220°C).
- In a large bowl beat the eggs and pumpkin together. In a separate bowl, combine the sugar, cinnamon, salt, ginger and cloves, and add to pumpkin mixture.
- Gradually stir in the evaporated milk. Carefully pour mixture into unbaked pie shell*.
- Bake at 425 degrees F (220°C) for 15 minutes. Reduce temperature to 350° F (175°C); bake for 40 to 50 minutes longer, or until the pie is set. Check for doneness by giving the pie a gentle wiggle. The center may jiggle just a tiny bit. It will continue to set up as it cools. Or, it is done when a sharp knife inserted in center comes out clean.
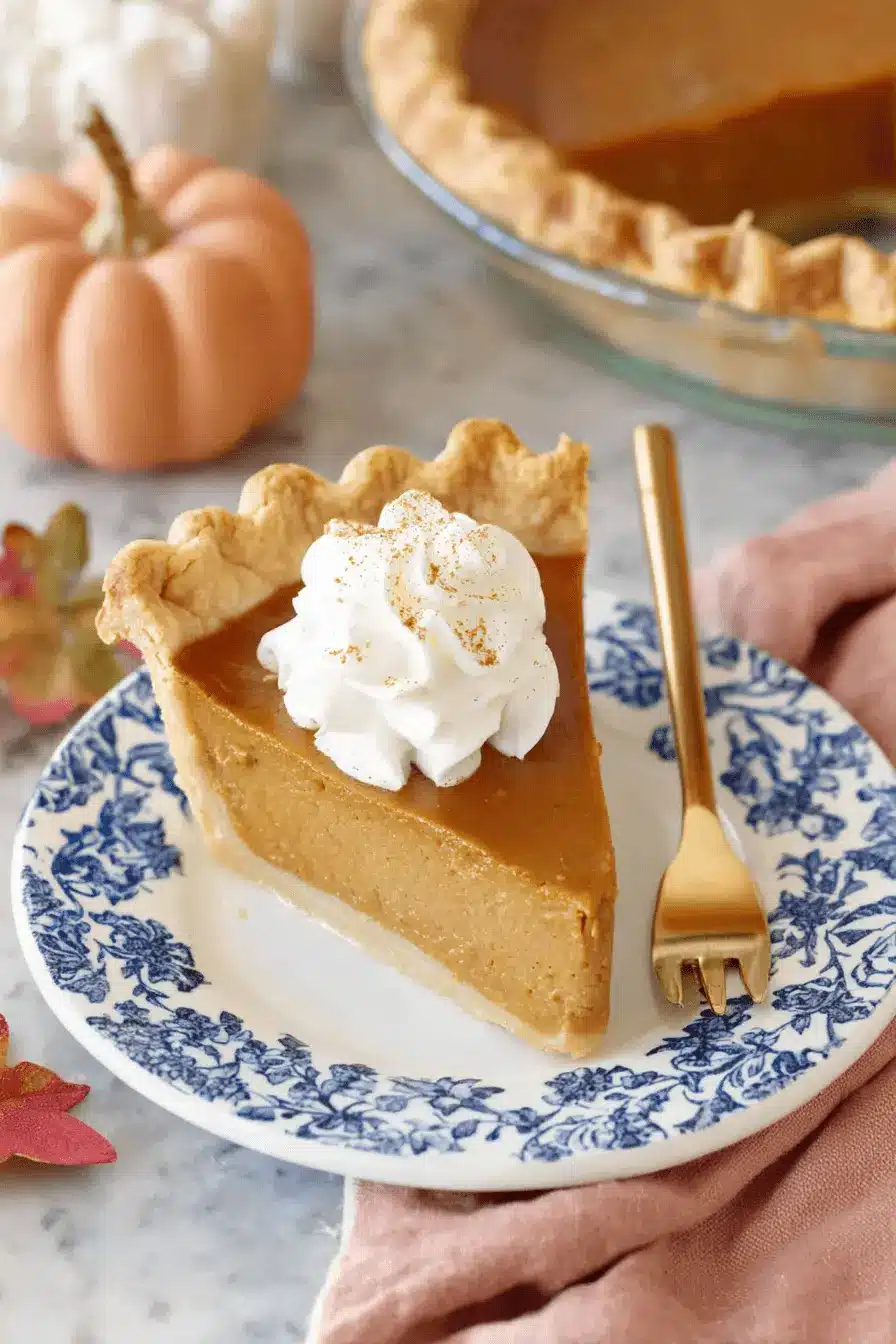
- Cool completely on a wire cooling rack. Serve immediately with whipped cream and caramel pecan topping, if desired.
The Secret to a Perfect, Crack-Free Pumpkin Pie
The one thing that can intimidate bakers is the fear of a cracked top on their beautiful pie. The good news is that preventing cracks is easy once you understand why they happen. Cracks are usually caused by over-baking or cooling the pie too quickly.
To avoid this, trust the “jiggle test.” When you gently nudge the pie, the edges should be set, but the very center should still have a slight jiggle, almost like gelatin. The pie will continue to cook from residual heat as it cools, so pulling it out at this stage is key.
Also, avoid sudden temperature changes. Instead of moving the pie directly from a hot oven to a cool counter, turn the oven off, crack the door open, and let the pie cool down gradually inside for about 30 minutes before moving it to a wire rack to cool completely. This gentle transition helps the custard set perfectly without splitting.
Homemade Pie Crust: The Foundation of Your Best Pumpkin Pie
While a store-bought crust works in a pinch, a homemade flaky pie crust truly elevates your pumpkin pie. The key to a crust that stays crisp and never gets soggy is to blind-bake it. This means partially baking the crust before you add the filling.
To do this, I press my rolled-out dough into the pie pan and crimp the edges. Then, I line the crust with parchment paper and fill it with pie weights or dried beans. I bake it for about 15-20 minutes, then remove the weights and paper and bake for another 5-7 minutes until it’s lightly golden. This creates a seal that prevents the liquid filling from seeping in. For more diverse and exciting recipes to try, explore our complete collection. (I’ll be sure to add process photos for mixing, rolling, placing in the pan, crimping, and blind-baking soon!)
Canned vs. Fresh Pumpkin: What You Need to Know
This is a common question, and honestly, there’s no wrong answer. Canned pumpkin puree (make sure it’s 100% pumpkin, not pie filling) is incredibly convenient and gives you consistent results every time. Its texture is thick and smooth, which is perfect for pie.
Making your own fresh pumpkin puree gives you a slightly lighter, more delicate flavor. If you want to try it, look for small pie pumpkins, often called sugar pumpkins. To make the puree, you’ll cut the pumpkin in half, scoop out the seeds, and roast it until tender. Then, just scoop out the flesh and blend it until smooth. This versatile ingredient is also perfect for other seasonal treats like delicious pumpkin bread. (I’ll post a full tutorial with process photos soon!)
Mastering Your Pumpkin Pie Spices (and Custom Blends)
The spices are what give pumpkin pie its signature warmth. Cinnamon is the star, providing a sweet and woody flavor. Ginger adds a bit of zesty heat, and cloves contribute a deep, almost peppery note. Together, they create a perfect balance.
Don’t be afraid to make this spice blend your own. If you love the bite of ginger, add an extra quarter teaspoon. If you prefer a more subtle spice profile, you can reduce the cloves. You could even add a tiny pinch of nutmeg or allspice. Start with the recipe as written, and then adjust it next time to create your perfect signature blend.
Ingredient Deep Dive: Understanding the “Why” Behind the “What” in Your Pumpkin Pie
Knowing why each ingredient is in the recipe can make you a more confident baker. In our pumpkin pie, the eggs are the binder; they create the custard structure that holds everything together as it bakes.
The evaporated milk is a secret weapon. It has less water than regular milk, which results in a richer, creamier pie that’s less likely to be watery. It also adds a subtle caramelized flavor. The granulated sugar does more than just sweeten the pie; it helps the custard set properly and contributes to that beautiful browning on top.
Pumpkin Pie Troubleshooting & Common Issues
Even with a foolproof recipe, things can sometimes go sideways. Don’t worry, I’ve got you covered.
- Soggy Bottom Crust: This is usually because the crust wasn’t pre-baked. Blind-baking, as I mentioned earlier, is the best fix for this.
- Pie Shrinking from the Crust: This often happens if the filling is over-mixed. Mix the filling ingredients until they are just combined to avoid incorporating too much air.
- Filling Seems Too Thin: Don’t panic! The filling for pumpkin pie is supposed to be very liquidy before baking. It will firm up into a perfect custard in the oven.
Serving Suggestions & Creative Garnishes for Your Pumpkin Pie
A dollop of whipped cream is classic, but why not have a little fun? You can infuse your whipped cream with maple syrup or even a splash of bourbon for a more grown-up flavor.
For a bit of crunch, a simple streusel topping or a sprinkle of toasted pecans is delicious. During the holidays, a few sugared cranberries can make your pie look incredibly elegant. You can also use small cookie cutters to make decorative shapes from leftover pie dough to bake and place on top. The pie pairs beautifully with a scoop of vanilla bean ice cream or a warm cup of coffee, perhaps even an Amazing Homemade Pumpkin Spice Latte.
Make Ahead, Storage, and Freezing Your Pumpkin Pie
You can absolutely make this pie ahead of time, which is a lifesaver for busy holidays. The pie can be baked, cooled completely, and stored in the refrigerator, loosely covered, for up to 3 days.
To freeze a baked pie, let it cool completely, then wrap it tightly in a few layers of plastic wrap and a final layer of aluminum foil. It will keep in the freezer for up to one month. Thaw it overnight in the refrigerator before serving.
Pumpkin Pie Recipe Variations
This recipe is also wonderfully adaptable for different dietary needs. Here are a few simple swaps you can make.
| Variation | Ingredient Swap/Adjustment | Notes/Tips |
|---|---|---|
| Dairy-Free | Replace evaporated milk with full-fat canned coconut milk (chilled, use only the thick cream). | Ensure the coconut milk is well-chilled to separate the cream. The flavor will have a subtle coconut hint. |
| Gluten-Free | Use a store-bought gluten-free pie crust or make a homemade gluten-free pie crust. | Ensure all other ingredients are naturally gluten-free. |
| Deep-Dish | Increase filling by 1.5x. Increase bake time slightly, checking for doneness. | May need to cover crust edges with foil sooner to prevent over-browning. |
Frequently Asked Questions About Pumpkin Pie
- Can I use fresh spices instead of ground?
Yes, freshly grated spices like cinnamon and nutmeg will have a more potent flavor. You might want to use slightly less than the recipe calls for. - What kind of pie pan is best?
I prefer using a glass or ceramic pie pan. They conduct heat evenly, which helps the crust bake through and allows you to see how the bottom is browning. - How long does homemade pumpkin puree last?
You can store fresh pumpkin puree in an airtight container in the refrigerator for up to 5 days or freeze it for up to 3 months.
Conclusion
I hope this guide makes you feel excited and ready to bake the most delicious pumpkin pie. There’s so much joy in creating something so comforting from scratch and sharing it with people you love. It’s a small win that can make any day feel a little brighter.
I would absolutely love to see your beautiful pies! If you make this recipe, please leave a comment below to let me know how it turned out. You can also tag me on social media so I can celebrate your baking success with you. For more stress-free recipes delivered right to your inbox, be sure to sign up for my newsletter
Pumpkin Pie Recipe
Ingredients
Equipment
Method
- Preheat your oven to 425 degrees F.
- In one bowl, beat eggs with pumpkin. In another, mix sugar and spices, then add to the pumpkin mixture.
- Gradually stir in the evaporated milk, then pour the complete mixture into the unbaked pie shell.
- Bake at 425°F for 15 minutes, then reduce heat to 350°F and bake for an additional 40-50 minutes until set; a knife inserted in the center should come out clean.
- Cool the pie completely on a wire rack before serving; optionally, top with whipped cream and caramel pecan topping.