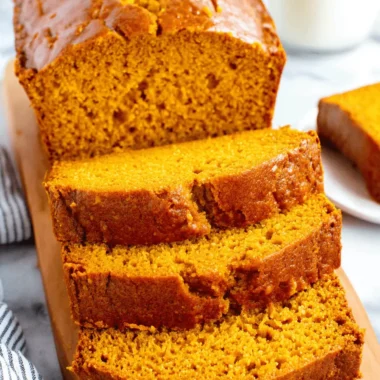

Whenever the first cool breeze of fall rolls in, my mind goes straight to one thing: the warm, comforting scent of spices baking in the oven. For me, that scent is pure pumpkin bread. It’s one of those recipes that feels like a hug from the inside out, and it’s been a staple in my kitchen ever since I started learning to cook without all the stress. I created this recipe to be completely fail-proof, so you can get that perfect, moist, and flavorful loaf every single time.
This isn’t just a recipe; it’s my ultimate guide to mastering pumpkin bread. I’ve packed it with all the tips and tricks I’ve learned over the years so you can skip the guesswork and get straight to the joy of baking. Whether you’re a beginner or have been baking for years, I promise this loaf will become a treasured favorite.
Why This Pumpkin Bread Recipe Will Be Your New Fall Favorite
I know there are a lot of pumpkin bread recipes out there, but I truly believe this one is special. It’s the one I turn to again and again because it never lets me down. Here’s why I think you’ll love it too:
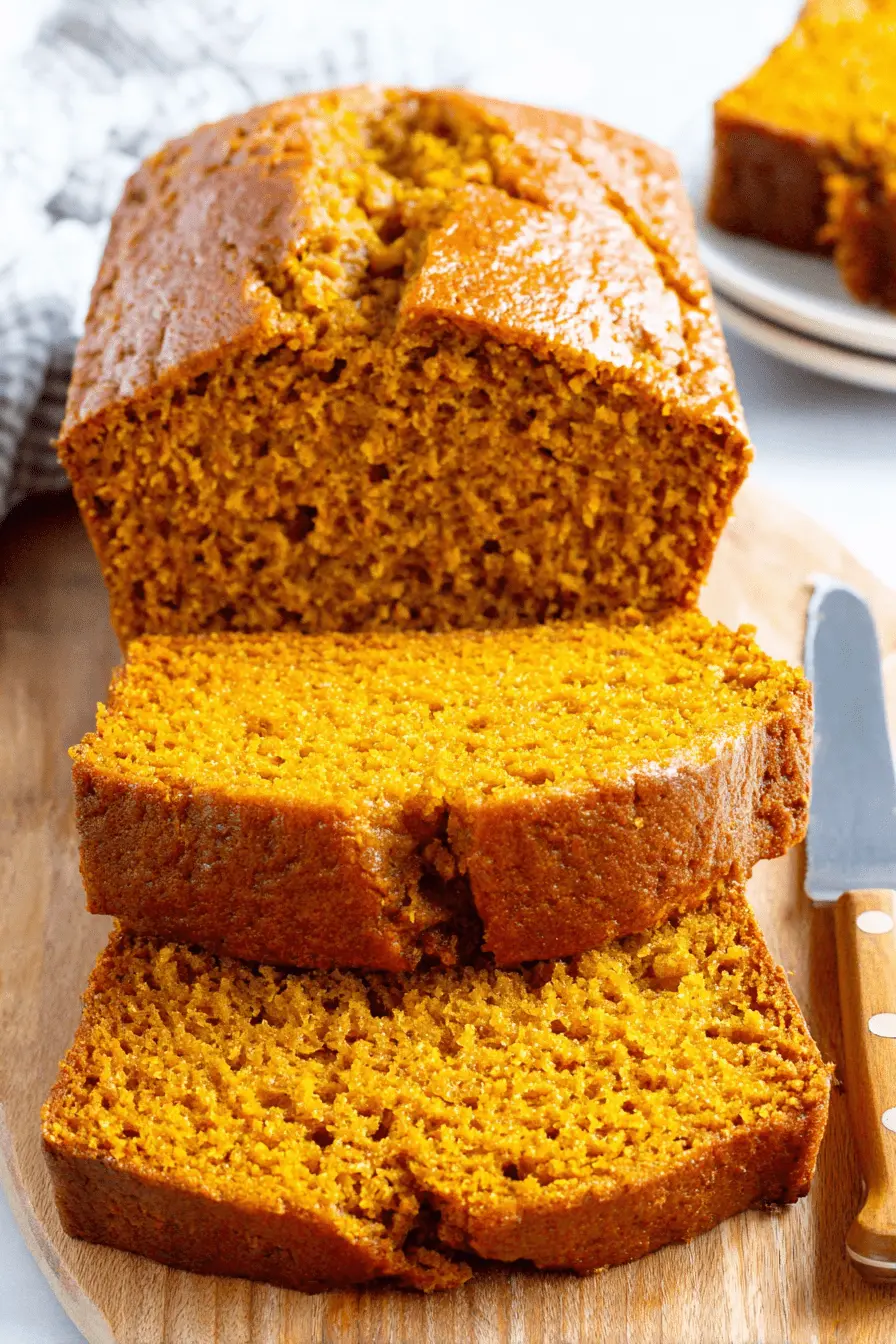
- Exceptionally Moist and Tender: This recipe is designed to deliver a perfectly moist crumb that stays fresh for days. I’ve perfected the balance of ingredients so you’ll never have to worry about dry, crumbly bread again.
- Perfectly Balanced Spices: The blend of cinnamon, nutmeg, and cloves gives this bread that classic, cozy warmth without overpowering the delicious pumpkin flavor. It’s comforting, aromatic, and tastes just like fall should.
- Genuinely Fail-Proof Method: I’ve included every tip I know to make this recipe a success. From how to measure your flour to the best way to check for doneness, my goal is to give you the confidence to bake the perfect loaf.
- Simple and Straightforward: While the guide is comprehensive, the recipe itself is wonderfully simple. It uses common pantry ingredients and easy-to-follow steps, making it perfect for a relaxing weekend baking session or even a weeknight treat.
Ingredients for Your Perfect Pumpkin Bread
- 2 cups all-purpose flour, (spooned into measuring cup and leveled-off)
- ½ teaspoon salt
- 1 teaspoon baking soda
- ½ teaspoon baking powder
- 1 teaspoon ground cloves
- 1 teaspoon ground cinnamon
- 1 teaspoon ground nutmeg
- ¾ cup (1½ sticks) unsalted butter, softened
- 2 cups sugar
- 2 large eggs
- 1 (15-oz) can 100% pure pumpkin (I use Libby’s)
How to Make the Best Pumpkin Bread: Step-by-Step Instructions
- Preheat the oven to 325°F (165°C) and set an oven rack in the middle position. Generously grease two 8 x 4-in (20 x 10-cm) loaf pans with butter and dust with flour. Alternatively, use a baking spray with flour in it, such as Pam with Flour or Baker’s Joy.
- In a medium bowl, combine the flour, salt, baking soda, baking powder, cloves, cinnamon, and nutmeg. Whisk until well combined; set this bowl aside.
- In a large bowl of an electric mixer, beat the butter and sugar on medium speed until just blended. Add the eggs one at a time, beating well after each addition. Continue beating for a few minutes until the mixture is very light and fluffy.
- Beat in the pumpkin puree. The mixture might look a bit grainy and curdled at this point, but don’t worry, that’s completely okay!
- Add the flour mixture to the wet ingredients and mix on low speed just until everything is combined.
- Turn the batter into your prepared pans, dividing it evenly between the two. Bake for 65 to 75 minutes. Your bread is done when a cake tester inserted into the center comes out clean, the top is a beautiful golden brown, and you see a slight crack down the middle. Let the loaves cool in the pans for about 10 minutes, then turn them out onto a wire rack to cool completely. Once completely cooled, cover the loaf with aluminum foil or store it in a cake keeper at room temperature for up to 3 days.
Pro Tips for the Moistest Pumpkin Bread Every Time
I’ve learned a few things over the years that make a huge difference. Following these simple tips will help you get that perfect bakery-style loaf right in your own kitchen.
- Accurate Flour Measurement: How you measure flour can make or break your bread. Instead of scooping directly from the bag, use a spoon to fill your measuring cup, then level it off with the back of a knife. This “spoon and level” method prevents you from packing in too much flour, which can lead to dry bread. For perfect results every time, a digital scale is a baker’s best friend.
- Perfect Loaf Pan Preparation: There’s nothing worse than a beautiful loaf stuck in the pan! To prevent this, make sure you generously grease the pans with butter and then lightly dust them with flour, tapping out any excess. Baking sprays that contain flour, like Pam with Flour or Baker’s Joy, are also fantastic, time-saving options.
- Don’t Overmix! Once you add the dry ingredients to the wet, mix only until you no longer see streaks of flour. Overmixing develops the gluten in the flour too much, which can result in a tough, dense, and gummy loaf instead of a tender one.
- Checking for Doneness: The cake tester trick is classic for a reason. Insert a toothpick or cake tester into the thickest part of the loaf. If it comes out clean, it’s ready. I also look for visual cues: the top should be firm to the touch, a deep golden-brown color, and it will often have a signature crack right down the middle.
Troubleshooting Common Pumpkin Bread Problems
Even the best of us run into baking hiccups! Here are a few common issues and how to fix them.
Why is My Pumpkin Bread Dry or Crumbly?
This is usually caused by one of two things: too much flour or over-baking. Be sure to use the “spoon and level” method for measuring your flour. Also, start checking for doneness at the lower end of the baking time. Ovens can vary, so yours might be done sooner than you think!
Why is My Pumpkin Bread Gummy or Raw in the Middle?
A gummy texture often points to under-baking. Your oven temperature might also be off, causing the outside to brown before the inside is cooked. Make sure your cake tester comes out completely clean from the center. An inexpensive oven thermometer can help you confirm your oven is heating accurately.
My Pumpkin Bread Sunken in the Middle!
A sunken center can happen from overmixing the batter, which creates too much air that later collapses. It can also be caused by opening the oven door too early, letting cool air rush in and stop the rising process. Mix just until combined and resist the urge to peek until the baking time is almost up.
Preventing a Cracked Top or Over-Browning
A crack on top of a quick bread is totally normal and often a sign of a good bake! However, if the top is browning too quickly before the inside is cooked, you can loosely tent a piece of aluminum foil over the top of the loaf about two-thirds of the way through the baking time.
Butter vs. Oil: Choosing Your Pumpkin Bread Base
One of the big debates in the pumpkin bread world is whether to use butter or oil. My recipe calls for butter because I love the rich flavor and tender, cake-like crumb it creates. Butter adds a depth that you just can’t get from anything else.
However, oil is fantastic for creating an incredibly moist, dense bread that stays that way for even longer. If you prefer an oil-based bread, you can typically substitute an equal amount of a neutral oil (like vegetable or canola oil) for the softened butter in this recipe. The texture will be slightly different, but just as delicious!
All About Pumpkin Puree: Canned vs. Fresh & Brand Recommendations
The key to great pumpkin bread is great pumpkin puree. It’s very important to use 100% pure pumpkin and not pumpkin pie filling, which is already sweetened and spiced. Canned pumpkin is incredibly convenient and consistent, which is why I almost always use it. I find that Libby’s brand gives me the most reliable, thick, and flavorful results every time. You can certainly use homemade pumpkin puree, but keep in mind that it often contains more water than the canned version. If you go the fresh route, perhaps you’ll also make an easy roasted pumpkin seeds recipe from the leftover seeds. I recommend letting the puree sit in a fine-mesh sieve lined with a coffee filter for about an hour to drain off any excess liquid. This will prevent your bread from becoming too dense or soggy.
Creative Variations & Substitutions for Your Pumpkin Bread
This recipe is a wonderful base for getting creative. Here are a few of my favorite ways to switch things up.
Flavorful Add-Ins
Gently fold in about ½ to 1 cup of any of these into the batter right before pouring it into the pans:
- Chocolate chips (mini or regular)
- Chopped pecans or walnuts
- Dried cranberries or raisins
- Shredded coconut
Spice It Up (or Down)!
Feel free to adjust the spices to your personal taste. If you don’t have all the individual spices on hand, you can easily use a pre-made pumpkin pie spice blend, which is perfect for fall baking projects like this bread or an ultimate foolproof pumpkin pie.
| Original Spice (1 tsp) | Substitution Options | Notes |
|---|---|---|
| Ground Cloves | ½ tsp Allspice | Adjust to taste. |
| Ground Nutmeg | ½ tsp Mace | Slightly milder flavor. |
| Individual Spices | 2-3 tsp Pumpkin Pie Spice | Use a good quality pumpkin pie spice blend as a substitute for the cloves, cinnamon, and nutmeg. |
Dietary Adaptations
While I haven’t tested all of these myself, you can often adapt quick breads like this one. A good 1-to-1 gluten-free flour blend can often be used, though the texture may be slightly different. For a dairy-free version, try using a dairy-free butter substitute. For a vegan loaf, you could try a commercial egg replacer, keeping in mind the results will vary.
Serving Suggestions & Perfect Pairings
This pumpkin bread is delicious all on its own, but a little something extra can make it feel even more special.
- Toppings: I love it with a simple smear of cream cheese frosting. A spiced glaze made from powdered sugar, a splash of milk, and a pinch of cinnamon is also wonderful. For an easy touch, a light dusting of powdered sugar looks beautiful.
- Pairings: Nothing beats a warm slice with a hot cup of coffee or a luxurious homemade pumpkin chai latte. It’s also fantastic alongside a mug of warm apple cider. For a decadent dessert, serve a slice with a scoop of vanilla ice cream.
Storage & Freezing Your Pumpkin Bread
To keep your bread moist, let it cool completely first. Then, you can wrap it tightly in aluminum foil or store it in an airtight container at room temperature for up to 3 days.
This bread also freezes beautifully! For longer storage, wrap the completely cooled loaf (or individual slices) in plastic wrap, then a layer of foil, and place it in a freezer-safe bag. It will keep well in the freezer for up to 3 months. Just thaw it on the counter when you’re ready for a treat.
Essential Tools for Baking Your Best Pumpkin Bread
You don’t need any super fancy equipment for this recipe. Here are the basic tools that will help you get the job done:
- Two 8×4-inch loaf pans
- Electric mixer (a stand mixer or hand-held mixer works great)
- Mixing bowls
- Whisk
- Measuring cups and spoons
- Rubber spatula
- Wire cooling rack
- Cake tester or a simple toothpick
Can I Make Pumpkin Bread Muffins or a Bundt Cake?
Absolutely! This batter is very versatile.
- For Muffins: Pour the batter into a lined muffin tin, filling each cup about ¾ full. Bake at a slightly higher temperature, around 375°F (190°C), for 20-25 minutes, or until a toothpick comes out clean.
- For a Bundt Cake: Generously grease and flour a bundt pan. Pour in the batter and bake at 325°F (165°C). It will likely need a bit longer than the loaves, so start checking for doneness around 70-80 minutes.
Frequently Asked Questions About Pumpkin Bread
- Can I use fresh pumpkin instead of canned?
Yes, you can. Just be sure to drain any excess water from your homemade puree so your bread doesn’t turn out too dense. The consistency of canned pumpkin is generally more reliable for baking. - How long does homemade pumpkin bread last?
Stored properly in an airtight container or wrapped in foil, it will stay fresh and moist at room temperature for about 3 days. - What kind of loaf pan is best?
A standard light-colored metal loaf pan is my go-to. Darker pans can sometimes cause the outside of the bread to brown too quickly. Glass or ceramic pans also work, but you may need to adjust your baking time slightly.
Happy Baking, My Friends!
There is something so satisfying about pulling a perfectly baked loaf of pumpkin bread from the oven. I hope this recipe brings a little bit of that simple, cozy joy into your home. It’s a reminder that cooking doesn’t have to be complicated to be incredibly rewarding.
I would absolutely love to see how your pumpkin bread turns out! If you try this recipe, please leave a comment below to let me know what you think. And don’t forget to share a photo of your creation on social media and tag me! For more stress-free recipes, be sure to subscribe to my newsletter.
Pumpkin Bread
Ingredients
Equipment
Method
- Preheat oven to 325°F (165°C) with a rack in the middle. Grease and flour two 8x4-inch loaf pans, or use a baking spray with flour.
- In a medium bowl, whisk together the flour, salt, baking soda, baking powder, cloves, cinnamon, and nutmeg until well combined, then set aside.
- In a large bowl with an electric mixer, beat butter and sugar until just blended. Add eggs one by one, beating well after each, until the mixture is light and fluffy. Beat in the pumpkin; a grainy texture is normal.
- Gradually add the reserved flour mixture to the wet ingredients and mix on low speed until just combined.
- Divide the batter evenly between the prepared pans and bake for 65-75 minutes, or until a cake tester comes out clean. Cool loaves in pans for 10 minutes, then transfer to a wire rack to cool completely before covering and storing at room temperature for up to 3 days.