
Why You’ll Love This Homemade Garlic Hummus Recipe
When I say this recipe is a game-changer, I truly mean it. It’s become a staple in my kitchen for so many reasons, and I know you’ll fall in love with it too.
- Unbelievably Creamy Texture: I’ve figured out the simple tricks to get that whipped, light, and airy consistency every single time, without any special equipment.
- Perfectly Adjustable Flavor: Whether you like a subtle hint of garlic or a big, bold punch, you are in complete control. I’ll show you how to customize it to your exact liking.
- Ready in Minutes: Life is busy, and I get that. This entire recipe comes together in less than 10 minutes, making it the perfect healthy snack or appetizer when you’re short on time.
- So Much Better Than Store-Bought: There’s nothing like the taste of fresh, homemade hummus. It’s brighter, more flavorful, and you know exactly what’s in it, no preservatives or weird ingredients.
Key Ingredients for Perfect Garlic Hummus
The magic of great hummus comes from a few simple, high-quality ingredients. You don’t need much, but choosing the right ones makes all the difference.
- Chickpeas: Canned chickpeas are my secret to keeping this recipe fast and easy. They are the foundation of the hummus, providing that earthy flavor and creamy body.
- Tahini: This is ground sesame paste, and it’s non-negotiable for authentic hummus. Look for a brand that is smooth and runny, not thick and clumpy, as it will blend much more easily.
- Lemon Juice: Freshly squeezed lemon juice is a must. It adds a bright, zesty flavor that cuts through the richness of the tahini and lifts the entire dip.
- Garlic: Fresh garlic cloves give this hummus its signature kick. I recommend starting with the amount in the recipe and adding more if you love a stronger garlic flavor.
- Olive Oil: A good quality extra virgin olive oil adds richness and a smooth mouthfeel. I use a little in the blend and a drizzle on top for serving.
Equipment You’ll Need for Silky-Smooth Hummus
You don’t need a fancy kitchen to make amazing hummus. I personally use my Magic Bullet for this, and it works wonderfully for smaller batches. A standard blender or a food processor will also get the job done perfectly.
If you’re using a smaller blender like a Magic Bullet, you might need to blend in two batches or stop and shake it a few times to get everything moving. For a high-speed blender or food processor, you’ll get an ultra-creamy result very quickly. Just remember to scrape down the sides a couple of times to make sure everything is evenly incorporated.
Ingredients for Your Easy Garlic Hummus
- 1 can chickpeas
- 2 tbsp chickpea juice
- 1/4 cup lemon juice
- 1/4 cup tahini
- 1 tbsp minced garlic
- 2 tbsp olive oil
- 1/2 tsp salt
- 1/4 tsp cumin
- 1 tbsp water
- 1 dash paprika
Step-by-Step Instructions: How to Make Creamy Garlic Hummus
- Drain chickpeas, reserving 2 tbsp of the chickpea juice.
- Add all ingredients to a blender (I use the magic bullet).
- Blend all ingredients to desired consistency, making sure all of the chickpeas have been crushed.
- When serving, make a small well in the hummus and add a small amount of olive oil and sprinkle with paprika if desired.
- Serve with pita chips, pita bread, or fresh vegetables to dip.
The Science of Creamy Hummus: Aisha’s Secret Tips for Perfection
The secret to restaurant-quality creamy hummus isn’t about working harder, it’s about understanding a little kitchen science. The real magic happens when you properly emulsify the tahini. An emulsion is just a fancy word for blending two ingredients that don’t normally mix, like oil and water. Here, it’s the fat in the tahini and the acid in the lemon juice.
For an even smoother result, try this trick: add the tahini and lemon juice to your blender first and whip them together for about a minute. They will seize up and look thick, but then they’ll transform into a creamy, fluffy paste. This creates the perfect base for your hummus.
Then, add the rest of your ingredients. The reserved chickpea juice, also known as aquafaba, is another secret weapon. It contains proteins that help make the hummus extra light and airy. Blending for a good few minutes, longer than you think you need, is key to breaking down the chickpeas completely for that silky finish.
Customizing Your Garlic Hummus: Flavor Variations and Adjustments
One of the best parts about making hummus at home is that you can make it exactly how you like it. I love a good amount of garlic, but feel free to adjust it to your taste. You can also get creative and add other flavors to the mix!
| Flavor Idea | Key Ingredients/Method |
|---|---|
| Mild Garlic | Use 1/2 tbsp minced garlic. |
| Medium Garlic | Follow recipe (1 tbsp minced garlic). |
| Strong Garlic | Increase to 1.5 – 2 tbsp minced garlic. |
| Super Garlicky | Use 2-3 tbsp roasted garlic for a milder, deeper garlic flavor. |
| Roasted Red Pepper | Add 1/2 cup roasted red peppers (drained) to the blender. |
| Spicy Chipotle | Add 1-2 chipotle peppers in adobo sauce to the blender. |
| Sun-Dried Tomato | Add 1/4 cup oil-packed sun-dried tomatoes (drained) to the blender. |
| Everything Bagel | Blend in 1-2 tsp everything bagel seasoning. Garnish with more. |
| Beetroot Hummus | Blend in 1/2 cup cooked beetroot (roasted or boiled, peeled) for a vibrant color. |
| Spinach & Artichoke | Add 1/2 cup thawed, squeezed spinach and 1/4 cup chopped artichoke hearts. |
Serving Suggestions: What to Dip in Homemade Garlic Hummus
Of course, warm pita bread and pita chips are classic choices for dipping, but don’t stop there! I love setting out a big platter of fresh, crunchy vegetables like carrot sticks, cucumber slices, bell pepper strips, and celery.
But hummus is so much more than just a dip. I use it as a creamy, flavorful spread on sandwiches and wraps instead of mayonnaise. You can also thin it out with a little water to create a delicious salad dressing or a sauce for grain bowls. It even works as a fantastic, savory base for a flatbread or pizza.
Storage and Make-Ahead Tips for Fresh Hummus
To store your homemade hummus, place it in an airtight container and pop it in the refrigerator. It will stay fresh for up to 5 days. To prevent a “skin” from forming on top, I like to drizzle a thin layer of olive oil over the surface before sealing the container. This creates a barrier and keeps it perfectly creamy.
For food safety, try not to leave homemade hummus out at room temperature for more than two hours. If it’s been out longer, it’s safest to discard it.
Health Benefits of Homemade Garlic Hummus
Making hummus at home means you control everything that goes into it. This recipe is packed with goodness. The chickpeas provide plenty of plant-based protein and fiber, which helps keep you feeling full and satisfied. You also get healthy fats from the tahini and olive oil, which are great for heart health. Because you’re making it fresh, you avoid the preservatives and excess sodium often found in store-bought versions. You can easily adjust the salt to fit your dietary needs or even make it oil-free by replacing the oil with a little extra water or aquafaba.
Troubleshooting Common Hummus Problems
Even with a simple recipe, things can sometimes go sideways. Don’t worry, I’ve been there! Here are some common issues and how to fix them.
- My hummus is grainy: This usually means the chickpeas aren’t fully broken down. The solution is simple: just keep blending! Let your blender or food processor run for a few extra minutes until it’s perfectly smooth.
- My hummus is too thick: If your hummus is more like a paste, it just needs a little more liquid. Add more water or aquafaba, one tablespoon at a time, blending after each addition until you reach your desired consistency.
- My hummus is too thin: This is an easy fix! You can thicken it by adding more chickpeas or another tablespoon of tahini. Blend again until it’s all incorporated.
- My hummus tastes bitter: Bitterness often comes from the tahini. Sometimes, older or lower-quality tahini can have a bitter edge. Using a good quality, fresh brand and adding that bright lemon juice helps balance out the flavors.
Frequently Asked Questions About Garlic Hummus
- Can I use dried chickpeas instead of canned?
Yes, you absolutely can. You’ll need to soak them overnight and then cook them until they are very tender before using them in the recipe. It takes more time, but the result is incredibly creamy. - How long does homemade hummus last in the fridge?
Stored in an airtight container, your homemade hummus will last for about 5 days in the refrigerator. - Can I make hummus without tahini?
You can, but the flavor and texture will be different. Tahini is what gives hummus its classic, nutty taste. If you have a sesame allergy, you could try substituting it with sunflower seed butter or just leaving it out and adding a bit more olive oil. - Why is my hummus sometimes bitter?
The most common reason for bitter hummus is the tahini. Make sure you’re using a fresh, high-quality brand. Blending the tahini with lemon juice first can also help mellow out any bitterness. - What if my hummus is too thick or too thin?
If it’s too thick, blend in a tablespoon of water or lemon juice at a time until it thins out. If it’s too thin, you can add a few more chickpeas or another spoonful of tahini to thicken it up. - Can I freeze homemade hummus?
Yes! You can freeze hummus in an airtight container for up to 3 months. Drizzle a layer of olive oil on top before freezing to prevent it from drying out. Thaw it in the refrigerator overnight and give it a good stir before serving.
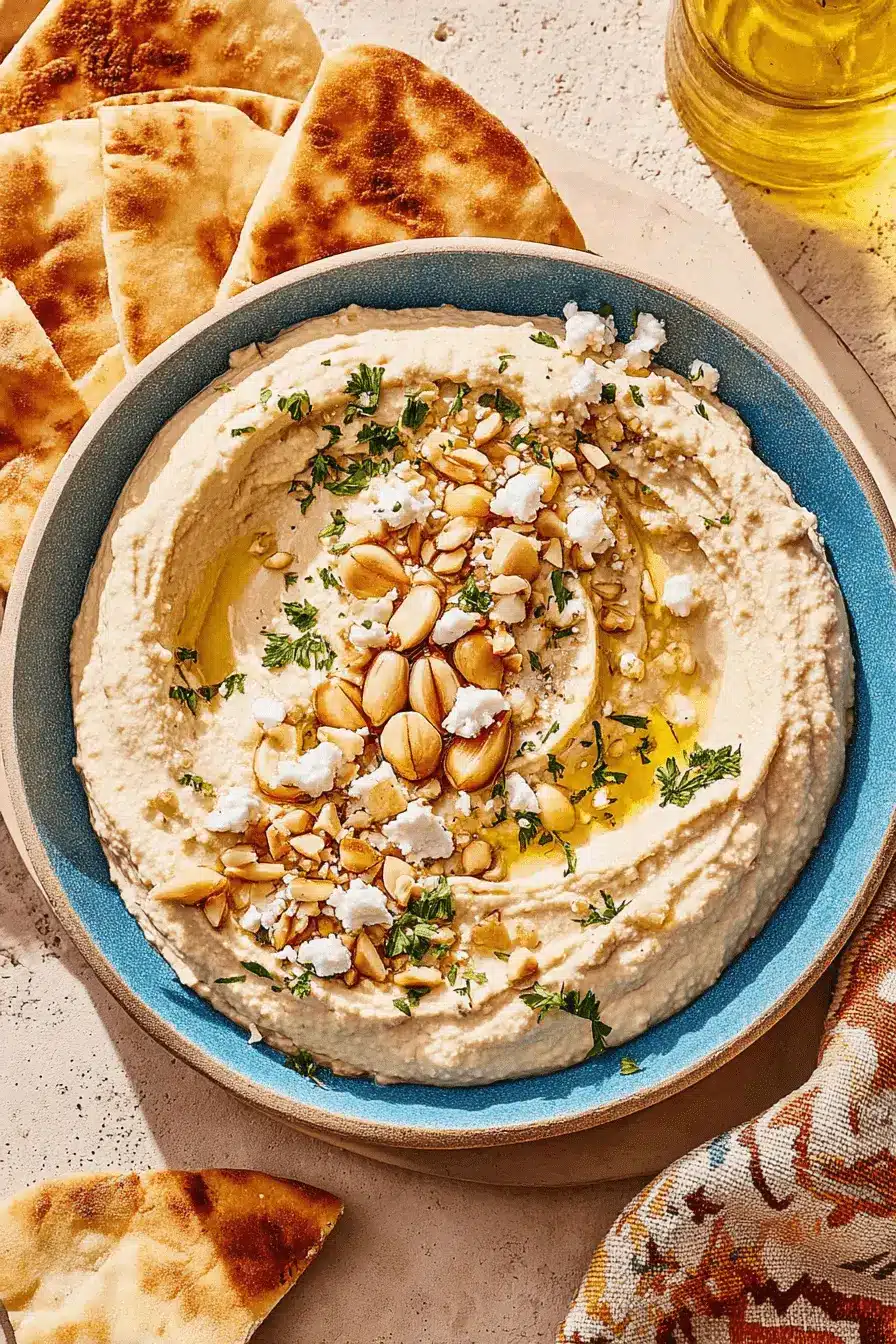
garlic hummus
Ingredients
Equipment
Method
- Drain the can of chickpeas, reserving two tablespoons of the chickpea juice.
- Combine all the ingredients in a blender, such as a magic bullet.
- Blend until the desired creamy consistency is achieved and all chickpeas are thoroughly crushed.
- When serving, create a small well in the hummus and add a drizzle of olive oil, then sprinkle with paprika if desired.
- Serve the hummus with your choice of pita chips, pita bread, or fresh vegetables for dipping.